Steps to activate your subscription and migrate your payroll data from Sage VIP Classic or Sage VIP Premier to Sage Payroll Professional.
Description
The detailed steps allow you to migrate your data to Sage Payroll Professional.
NOTE:We only allow company data uploads from Sage VIP Classic and Sage VIP Premier. For Sage Business Cloud Payroll and Sage Pastel Payroll, you'll need to complete a setup and take-on of all data.
Resolution
The migration process has three sections:
Preparation of the user data for migration to Payroll Professional
Migration of subscription and data
Review of tasks and discuss changes
Preparation of data for migration
Step 1
Create a backup of your payroll data
This must be a Full System Backup and will be kept as a restore point in case you need to revert back to the original system.
Step 2
Ensure the payroll system has been updated to the latest release
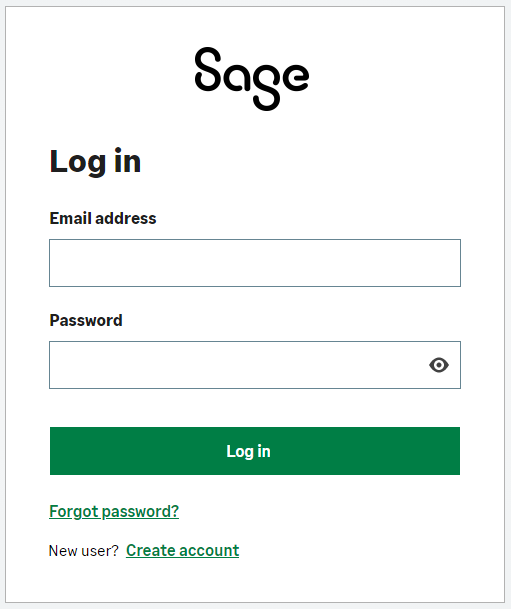
You will be prompted to enter your existing Sage account Email and Password, if a Sage account was previously created.
If no Sage account was created before, you can select to Create a new account as a New user.
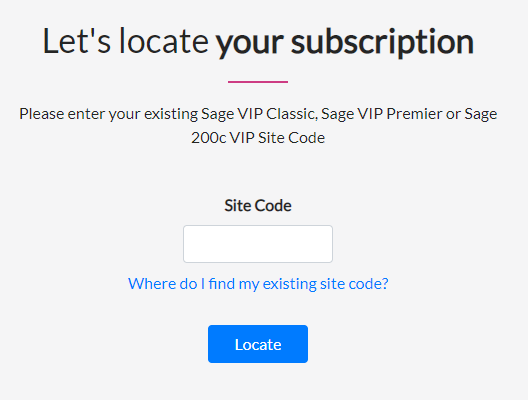
Enter the subscription Site Code and click on Locate
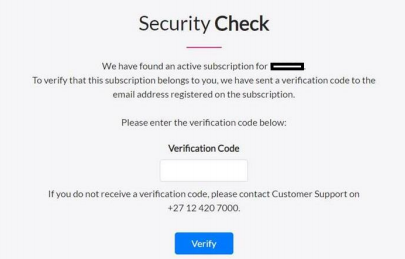
When the subscription is located, a Verification Code will be sent to the customer primary email address registered on the subscription with Sage. You will need to ensure that you have access to the mailbox to retrieve the verification code.
TIP: To review the primary email address of the subscription, the information can be verified by the customer by logging into Sage Portal (https://portal.sage.co.za/shp). Select My Account > Maintain Site User Access , and review which user is flagged as a Default (Admin user).
The email will be sent from [email protected] with the subject "Sage Business Cloud Payroll Professional Migration - Verification Code"
Enter the Verification Code and click on Verify
You will be routed to the subscription
Step 4
Upload existing company data
You can upload existing payroll data from Sage Classic, Sage Premier and Sage 200c VIP to your subscription if:
both the desktop payroll (where the data will be downloaded from) and cloud application (where the data will be uploaded to) must be on the same release/version for the data to be recognised for upload. Click here to validate the current release version for Payroll Professional.
both desktop and cloud applications must have the same Site Code.
If the data directory has a different Site Code than the Payroll Professional subscription (e.g. taking over payroll companies from another site), a temporary desktop site renewal license code for the migration needs to be obtained from Sage Customer Support.
CAUTION: This request should be done in advance to ensure you have the temporary code available on the day of migration, as the request is subject to request submission turn-around times)
Access all the companies, prior to uploading payroll data to ensure the Site Code of the system is written to each employee record (if forms part of the cloud security which links the employees with the specific subscription.
Ensure no other users are accessing the payroll data during the upload process
The Upload Payroll Data option is available under the Actions button on the subscription page.
NOTE: The upload duration of payroll data is subject the data upload speed of the Internet connection.
Step 5
Launch the payroll
From the Subscription page, click on Launch to open up the application
The Company Listing Screen will display all companies uploaded.
The current user is set as the Super User, and will be able to invite more users to access the system, with different levels of access. There should however be at least one Super User, but you can assign more than one Super User.
NOTE: When you launch the subscription, the system will validate modules and number of employees licensed.
Step 6
Rebuild the data
Ensure that there is no data corruption that might have occurred during the upload process by rebuilding all the data files
Existing Skills and Equity Module plans will need to be recreated on the module screens
Flexi Utility Layouts will need to be recreated (Flexi Fixed, Financial and Combined Flexi)
Step 8
Import Template Companies
Payroll Professional also offers template companies that the user can import.
The numbers of the reports are static, and can only be changed by copying the reports to a new number
If you have an existing report with the same number, you will not be able to import the template company.
Step 9
Additional steps for Sage Self Service users
Deactivate the validation of leave transaction validation numbers:
From the Main Menu > Leave > Leave Control
Untick "Validate Reference Numbers"
All employees with Pay Method 03 ACB on the Payments Details screen, must be linked to a Branch Code (displaying Bank and Branch Name on Payment Details screen)
Upload the Consent, Company, Administrator, Employees and sync leave balances
Consent
Company and Administrator
From the Main Menu > Self Service > Sage Self Service > Company Setup
Select to upload Company, then Administrator
Employees
From the Main Menu > Self Service > Sage Self Service > Company Setup
Select Step 2.1 and click Continue - all employees where consent was previously was seelcted ,will be included
Upload the Employees on Step 2.2 (Activate consent)
Select all Employees on Step 3.1
Upload Employees on Step 3.2
Synchronics balances
From the Main Menu > Self Service > Sage Self Service > Sync and Report
Select to Sync all leave balances
Review and discuss changes
The follow additional demonstration steps and discussion should be done after migration of the payroll data:
Step 1
Define Access Control
All existing access has been cleared, and new users will need to be created.
The main user will be the Super User, who will be able to create and maintain Access Control
There can be more than one Super User, but you cannot have the system without a Super User
It will be important to be aware of the responsibilities of a Super User, to give and revoke access, when a user joins or leaves the company, or when a new Super User needs to be setup (succession planning).
Upload all report logos and watermark files (Company > Miscellaneous > Miscellaneous 3)
We also recommend to import all the standard reports again to ensure all 72-line reports are available to print.
Step 3
Import and Test Reports & Payslips
CAUTION: ODBC, SMART and Sage intelligence reporting is not supported on Payroll Professional.
It is recommended to import all the standard and module reports using the Batch Import functionality in all payroll companies.
NOTE: Importing and overwriting existing reports will remove sorting and selections.
Print reports to PDF and ASCII and export History reports to demonstrate how the documents and files are downloaded.
All files will download by default to the local computer Downloads folder, unless defined otherwise on the browser
Print test payslips - It is recommended to use the Payslip Print options, and not User Defined payslip options (as this might need manual customisation)
CAUTION:Dotmatrix printing is not recommended on Payroll Professional. Click here for more information.
NOTE: New login details were setup when the Sage account was created to access the payroll. It is important that the PDF Company and Employee setup is checked, to ensure the setup is correct, in case the customer use passwords to encrypt the documents. If Default Password is selected, the user will need to enter a password to be used for reports (default will refer to the user number on Access Control)
Step 4
Test Imports and Exports
Demonstrate the process of importing and exporting files e.g. ACB and Flexi files
Exports and Imports now work with Upload and Download.
Exports – the user downloads the file to the Downloads or selected folder.
Imports - the user chooses the input file and upload the file.
Test ACB import (if used) into banking software
Test General Ledger import
Step 5
ETI Setup Check
This is for South African companies only
Review the setup by reselecting the setup option onscreen, and recalculate the ETI values.
Review the ETI min Wage codes. The minimum wage codes are directory wide files. Reason for not uploading directory wide files on migration are that if any manual setup was done prior to upload of file, the codes will be overwritten. This is to avoid loss of manually captured info. Codes need to be loaded manually.
Do spot checks to confirm the remuneration and ETI values on employees, to ensure the setup applied correctly.
Step 6
Review new/changes features not available in Sage VIP Classic, Sage VIP Premier or Sage 200c VIP
Quick Add Employee (add new employee on one screen, RSA companies only)
Employee photo upload – you can move and scale to fit the employee photo.
User Defined Payslips (Previously Payslip Print) available under Payslip Print menu (merged with New Payslip Print)
Only Stop Further Entry is available as a global function.
In-app Live Chat and News from Sage (with hyperlinks) available from main menu
You can now sort on Company Listing screen
You can sort on the Employee Lookup list
NOTE: To activate sorting on a lookup list, you first need to click on the listing grid to activate the functionality
You can route on employee number (#XXXXXXXX where XXXXXXX represents employee code)
CTRL + or – will make screen bigger/smaller (if the screen display looks incorrect, zoom to 20%, then return to 90% to justify the view)
The following modules or features are not available on Payroll Professional:
Job Management
Extended GL (mSCOA)
Insight Reporting
SMART reporting
Sage Intelligence
ODBC
Step 7
Creating backups and restoring data
Backups made automatically before importing files and before starting a new pay period. Related articles:
Tax Year-end instances available when you start a new tax year - data is automatically copied and available under the Action menu option. Related articles:
 NOTE: We only allow company data uploads from Sage VIP Classic and Sage VIP Premier. For Sage Business Cloud Payroll and Sage Pastel Payroll, you'll need to complete a setup and take-on of all data.
  CAUTION: If the account status is "On Hold" or "Closed", the subscription will not be available to migrate.
 TIP: To review the primary email address of the subscription, the information can be verified by the customer by logging into