Installing and registering Sage 50cloud Pastel Accounting
Summary
Resolution
Before starting with the installation process, ensure your machine meets the System Requirements to run Sage 50cloud Accounting.
Click here to access the Download Manager and download Sage 50c Pastel Partner or Sage 50c Pastel Xpress file based on which package you want to install.
Refer to sections below for more details on installing and registering Sage 50cloud Pastel Accounting.
 NOTE: Click a topic depending on what you want to do to expand the text with more details.
How to install Sage 50cloud Pastel Accounting
NOTE: Please note that the screenshots used are for Pastel Partner but the procedure is the same for Pastel Xpress.
- Navigate to the location where you downloaded the installation file
- Double click on the Setup.exe
- The Install Shield wizard will launch:
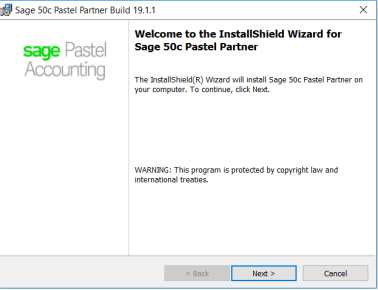
- Click Next
- The License Agreement screen will display:
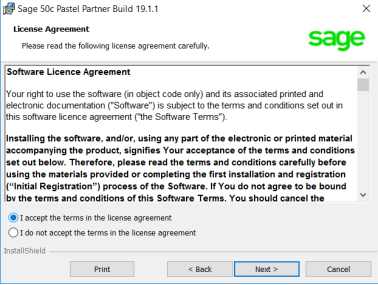
- Read the License Agreement
- Click I accept the terms in the license agreement NOTE:
The installation will not continue unless you accept the license terms. - Click Next
- The Setup Type screen will display:
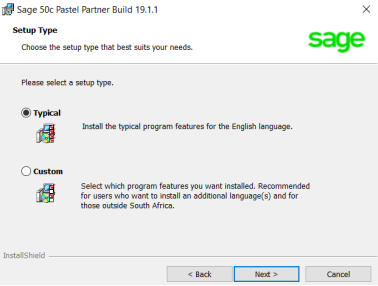
- Click Typical installation
- Click Next
- The Destination Folder screen will display:
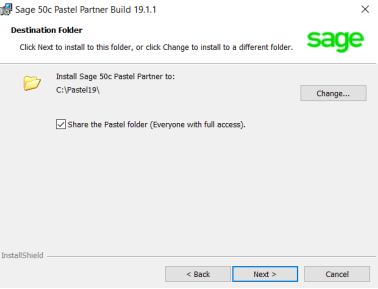
- Click Next
- The Ready to Install the Program screen will display:
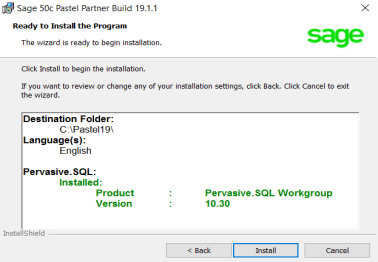
- Click Install
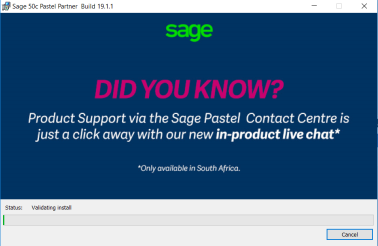
- The Sage 50c Pastel Accounting installation progress indicator will display:
- Once the install completes, the Install Shield Wizard Completed screen will display:
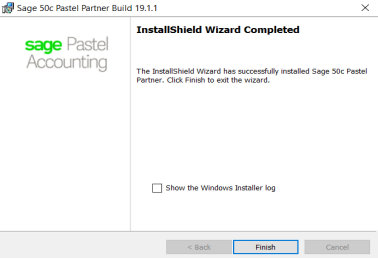
- Click Finish to complete the installation
- If asked to restart your computer, restart
Once done open Sage 50cloud Pastel Accounting and follow the steps on topic 2 or 3 to register the software depending on where machine is server or workstation.
Registering Sage 50cloud Pastel Accounting on server or single-user
Before registering Sage 50cloud Pastel Accounting please ensure the following has been done.
- Sage 50cloud Pastel Accounting software must be installed
- Ensure you have your Base Serial number and modules (these can be found on the invoice)
- Ensure you have a valid Internet connection
If you are registering your software for the first time, the Registration Wizard will be launched automatically upon opening the software.
Follow the steps below to register Sage 50cloud Pastel Accounting.
- Click Help...Register Your Package from the Pastel menu
- The ‘Welcome to Pastel’ screen will display
- Click Next
- The ‘Registration Type’ screen will display
- Select Single user/Server Registration and click Next
- The ‘Registration Details’ screen will display
- Select Register Online
- Enter the Base Serial Number and Company Name as it appears on your invoice
- Click Next
- The ‘Web Registration wizard’ will launch. You will need to enter the access code
- If you cannot see the access code please move the Web Registration window until you can as shown below:
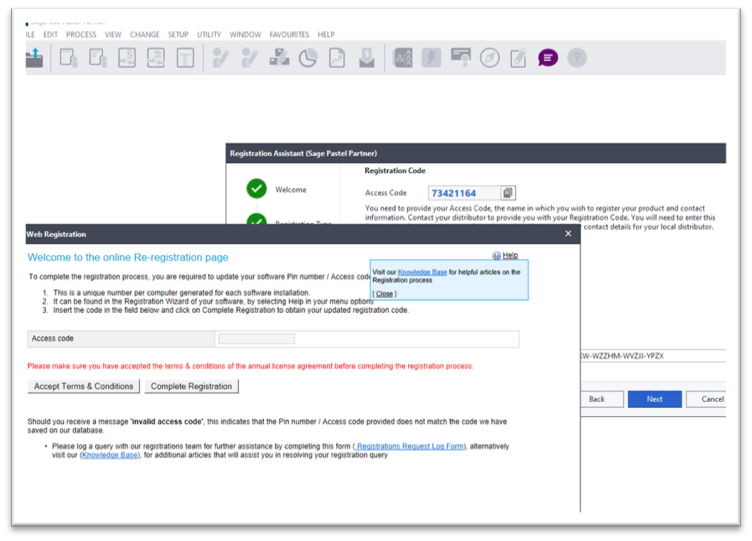
- You may be required to accept the Terms & Conditions before completing your registration
- The add on modules will pull through as per your invoice
- Click on Complete Registration
- The ‘Registration Code’ screen will display, with the Registration Code already filled in
- Click Next
- The ‘Summary’ screen will display
- A Summary will appear confirming your registration details
- Click Next
- Click Finish
- Close and reopen your software for the registration to take effect.
Registering Sage 50cloud Pastel Accounting on workstation
Before registering Sage 50cloud Pastel Accounting on the workstation, please ensure the following has been done.
- Sage 50cloud Pastel Accounting software must be installed
- Ensure that the Pastel folder is shared on the server and you have mapped the network drive for Pastel on the workstation.
Click here on how to share folder.
Click here on how to map network drive
If you are registering your software for the first time, the Registration Wizard will be launched automatically upon opening the software.
Follow the steps below to register Sage 50cloud Pastel Accounting.
- Click Help…Register Your Package from the Pastel menu
- The ‘Welcome to Pastel’ screen will display
- Click Next
- Click Workstation Registration
- On the Pastel Server PC Path field, click the magnifying glass
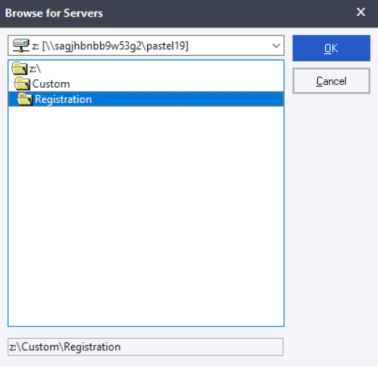
- In the first box click the drop-down menu and click the mapped drive
- In the folder section double click the Custom folder
- Double click the Registration folder and click OK
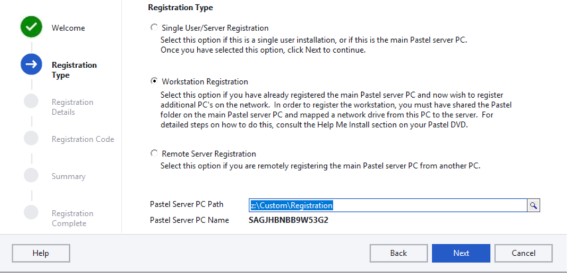
- The mapped drive location will show in the Pastel Server PC Path field and click Next
- The Summary will display your registration details
- Click Next and Finish
- Close and re-open your software for the registration settings to take effect.
Updating from previous build
Once you have downloaded the file, close Pastel on all machines and install the new build.
Follow the instructions below if you are updating from previous build e.g. Build 19.4.3 to Build 19.4.4.
NOTE: You will need to run the installation on all machines. We recommend that you install Sage 50cloud Pastel Accounting on server first.
- Navigate to the location where you downloaded the installation file
- Double click on the Setup.exe
- The Install Shield wizard will launch:
- Click Next
- The update screen will display
- Click Update
- If the screen to find original setup.exe as below comes up click No

- The Sage 50c Pastel Accounting installation progress indicator will display:
- Once the install completes, the Install Shield Wizard Completed screen will display:
- Click Finish to complete the installation
- If asked to restart your computer, restart
Once done open Sage 50cloud Pastel Accounting when you open any company for the first time you get message as below to update the company data to the new build. Follow the steps below to update the company data.

- Click Yes to process backup
- Continue with the backup process. Refer to article How do I process a backup Sage 50cloud Pastel Accounting? if needed
- When backup is complete you will get message as below

- Click Yes to continue updating the company data
- Once the update is done you will be prompted to enter password
 TIP: View reports e.g. Trial Balance, Customer reports etc and run Data Integrity to ensure data has been updated successfully.
Upgrading from another version to Sage 50cloud Pastel Accounting
Once you have downloaded the file, close Pastel on all machines and install the new version.
Follow the instructions below if you are updating from previous version e.g. Version 18 to Version 19.
NOTE: You will need to run the installation on all machines. We recommend that you install Sage 50cloud Pastel Accounting on server first.
- Navigate to the location where you downloaded the installation file
- Double click on the Setup.exe
- The Install Shield wizard will launch:
- Click Next
- The License Agreement screen will display. Read the License Agreement
- Click I accept the terms in the license agreement NOTE:
The installation will not continue unless you accept the license terms. - Click Next
- The Setup Type screen will display:
- Click Typical installation
- Click Next
- The Ready to Install the Program screen will display:
- Click Install
- The Sage 50c Pastel Accounting installation progress indicator will display:
- Once the install completes, the Install Shield Wizard Completed screen will display:
- Click Finish to complete the installation
- If asked to restart your computer, restart
Once done open Sage 50cloud Pastel Accounting and follow the steps on topic 2 or 3 to register the software depending on where machine is server or workstation.
If you were using Version 11 or lower, you will need to convert data so you can access it on Sage 50cloud Pastel Accounting. Refer to article How do I access companies from previous Version on Sage 50c if needed.
NOTE: There is no need to convert data from Version12, Version14, Version 17 or Version 18. Data from any of these versions will be updated to the latest version when you open it on Sage 50cloud Pastel Accounting as below.
When you open any company for the first time you get message as below to update the company data to the new build. Follow the steps below to update the company data.
- Click Yes to process backup
- Continue with the backup process. Refer to article How do I process a backup Sage 50cloud Pastel Accounting? if needed
- When backup is complete you will get message as below
- Click Yes to continue updating the company data
- Once the update is done you will be prompted to enter password
TIP: View reports e.g. Trial Balance, Customer reports etc and run Data Integrity to ensure data has been updated successfully.
Add-on Modules Installation and Registration
Sage Intelligence, Point of Sale and Debtors Manager modules must be installed to access them on Sage 50cloud Pastel Accounting.
You need to purchase add-on modules as these are not available on the Base package of Pastel Partner.
If you have not purchased the module, click here to contact our Sales Team. After you have purchased the module, you need to add the additional module number to your Base serial number and re-register Pastel to activate the module.
Click each module for steps on how to install.
Pastel Point of Sale Access Version
Pastel Point of Sale SQL Version
Pastel Debtors Manager Access Version
Pastel Debtors Manager SQL Version
Once you have obtained the serial number for the add-on module, you can register the module on the server as per the steps below.
NOTE: If you are licensed for a single user, you need to follow the steps as below on your machine only.
- Click Help… Register your Package.
- Click Next.
- On the following screen, select Single User/Server Registration.
- Click Next.
- On the following screen, make sure Register Online is ticked.
- In the registered name field.
- Click Next.
- A small screen will pop up.
- Enter the serial number for the add-on module in the Add Module Box and click the Add Module button. TIP:
To view your module serial numbers, refer to your invoice. - Click the Complete Registration button.
- The system will return you to the Registration Assistant.
- Click Next until the last screen of the Registration Assistant.
- Once completed, re-register Pastel on the workstation.
Refer to topic 3 for steps to register workstations.
Solution Properties
- Solution ID
- 240729143451203
- Last Modified Date
- Mon May 11 13:51:01 UTC 2026
- Attributes
- Product Details
- Views
- 0