
Summary
Description
Users need to have an existing profile on the Sage Accounting website or need to sign-up via the website to make use of the Sage Accounting Mobile application.
The app is available for download on the Apple App Store and Google Play Store for new and existing customers.


The application is free to use as a companion app to the website version of Sage Accounting in South Africa.
Watch our Sage Accounting Mobile App Video
For more info go to https://www.sage.com/en-za/sage-business-cloud/accounting/app/ or view Sage Accounting Mobile FAQs
Resolution
Login
After the new installation, swipe to continue until the Login button is displayed.


Users need to familiarize themselves with the Sage Terms and Conditions as well as the Sage Privacy Policy before continuing to log into the application.
On the Login Screen, there is an option to access a Demo Company that will allow users to familiarize themselves with the application without affecting their company information.

Did you know: you can allow the mobile application to be accessed via biometric options such as facial recognition or the use of fingerprint login? View our article on How to Setup Biometric Login
Note: Ensure that the user has adequate permissions to access the company including Add-Ons. This can be checked under Administration > Control User Access for the company they need to access.
Home Screen
The Home Screen displays a dashboard that includes a list of outstanding tasks in the To-Do List section and Unpaid Invoices.

Should users have access to more than one company, they can click on the highlighted option below, next to the current company name, to select and access a different company.

By selecting the Quick Actions option on the Home screen, users will be able to add new transactions, customers, suppliers, and items on the go.


To access a more detailed display of Quotes, Invoices, and Customers, click on the options displayed in the green ribbon at the bottom of the screen.
Customers

Customers are listed alphabetically with their current balances indicated on the grid.

Users can search by Customer Name or select an applicable filter from the Filter option that will simplify the display of the relevant customers.

- If the customer’s name is known to the user, it can quickly be accessed by selecting the starting letter of the Customer name from the Index displayed on the right of the Customer grid.
- New Customers can be added.
- Existing Customer details may be updated and saved.
- When selecting a Customer, the user can see a Detailed display of information as well as any Documents (Quotes and/or Invoices) that are linked to the specific customer.

- Quotes and Invoices can be added while viewing the details of a specific Customer.
Suppliers
Navigate to Home Screen > More > Suppliers


Suppliers are listed alphabetically with their balances indicated on the grid.

Users can Search by Supplier Name or select an applicable filter from the Filter option that will simplify the display of the relevant suppliers.

- If the Supplier’s name is known to the user, it can quickly be accessed by selecting the starting letter of the Supplier name from the Index displayed on the right of the Supplier grid.
- New Suppliers may be added while viewing the grid.
- Existing Supplier details may be updated and saved.
Items
Navigate to Home screen > More > Manage Items


Items are listed alphabetically with the Quantity on Hand and Inclusive/Exclusive prices are also displayed.

Users can Search by Code or Description or select an applicable filter from the Filter option that will simplify the display of the relevant items.

- If the Item’s description is known to the user, it can quickly be accessed by selecting the starting letter of the description from the Index displayed on the right of the Items grid.
- New Items may be added while viewing the grid.
- Existing Item details may be updated and saved.
Customer Documents(Quotes and Invoices)
Quotes

All Quotes are listed with the most recent Quote displayed at the top.

- Users can search by Document Number or Customer Name or select an applicable filter from the Filter option that will reduce the number of records being displayed.
- The grid indicates the Customer Name with the Value of the Quote.
- The status of the Quote is indicated, and the colour options make it easy to spot different statuses.
- Invoiced Status - Green
- Pending Status - Blue
- Accepted Status – Green
- Declined Status – Red
- Expired Status – Red
- The user may select Add new Quotes from this screen.

By selecting a specific Quote, the user will be allowed to:
- View Details of the Quote
- Email the Quote
- Edit Info if necessary
- Update the Status of the Quote
- Create an Invoice from the specific quote and
- Share the Quote (via Whatsapp, Messenger, Email, etc)
Invoices

All Invoices are listed with the most recent Invoice displayed at the top.

- Users can search by Document Number or Customer Name or select an applicable filter from the Filter option that will reduce the number of records being displayed.
- The grid indicates the Customer Name with the Value of the Quote.
- The status of the Invoice is indicated, and the colour options make it easy to spot different statuses.
- Unpaid Status - Yellow
- Overdue Status - Red
- Paid Status – Green
- Partially Paid Status – Grey
- The user may select Add new Invoices from this screen.
By selecting a specific Invoice, the user will be allowed to:
- View Details of the Invoice
- Email the Invoice
- Edit Info if necessary
- Share the Invoice (via Whatsapp, Messenger, Email, etc)
Receipts
Receipts can be accessed via the Home screen by selecting the Quick Actions option or selecting More and then the Receipts menu option.
For more information on Receipts, view Mobile App: Receipts
Company Settings
You can navigate to Company Settings in two ways:
- Home screen > Quick Actions > Company Settings
- Home screen > More > Company Settings

- Company Details – Setup Company details and information.
- Additional Company Information – Setup of Statutory Information and Additional Company Information.
- VAT Settings – Setup of VAT Details and select the default VAT Type.
- Biometric Login – To allow the mobile application to be accessed via biometric options such as Facial recognition or the use of fingerprint login. View our article on How to Setup Biometric Login
Sharing documents
You will be able to share on any support messaging or mailing app such as Whatsapp, Telegram, Outlook, Teams, Gmail, etc.
To share the document, navigate to it on the Sage Accounting Mobile App, and click on the document to bring it up on the screen.
- Scroll to the bottom of the document.
- Click on the Share button

The document will be shared as a PDF file. Choose the application you want to share the document on.
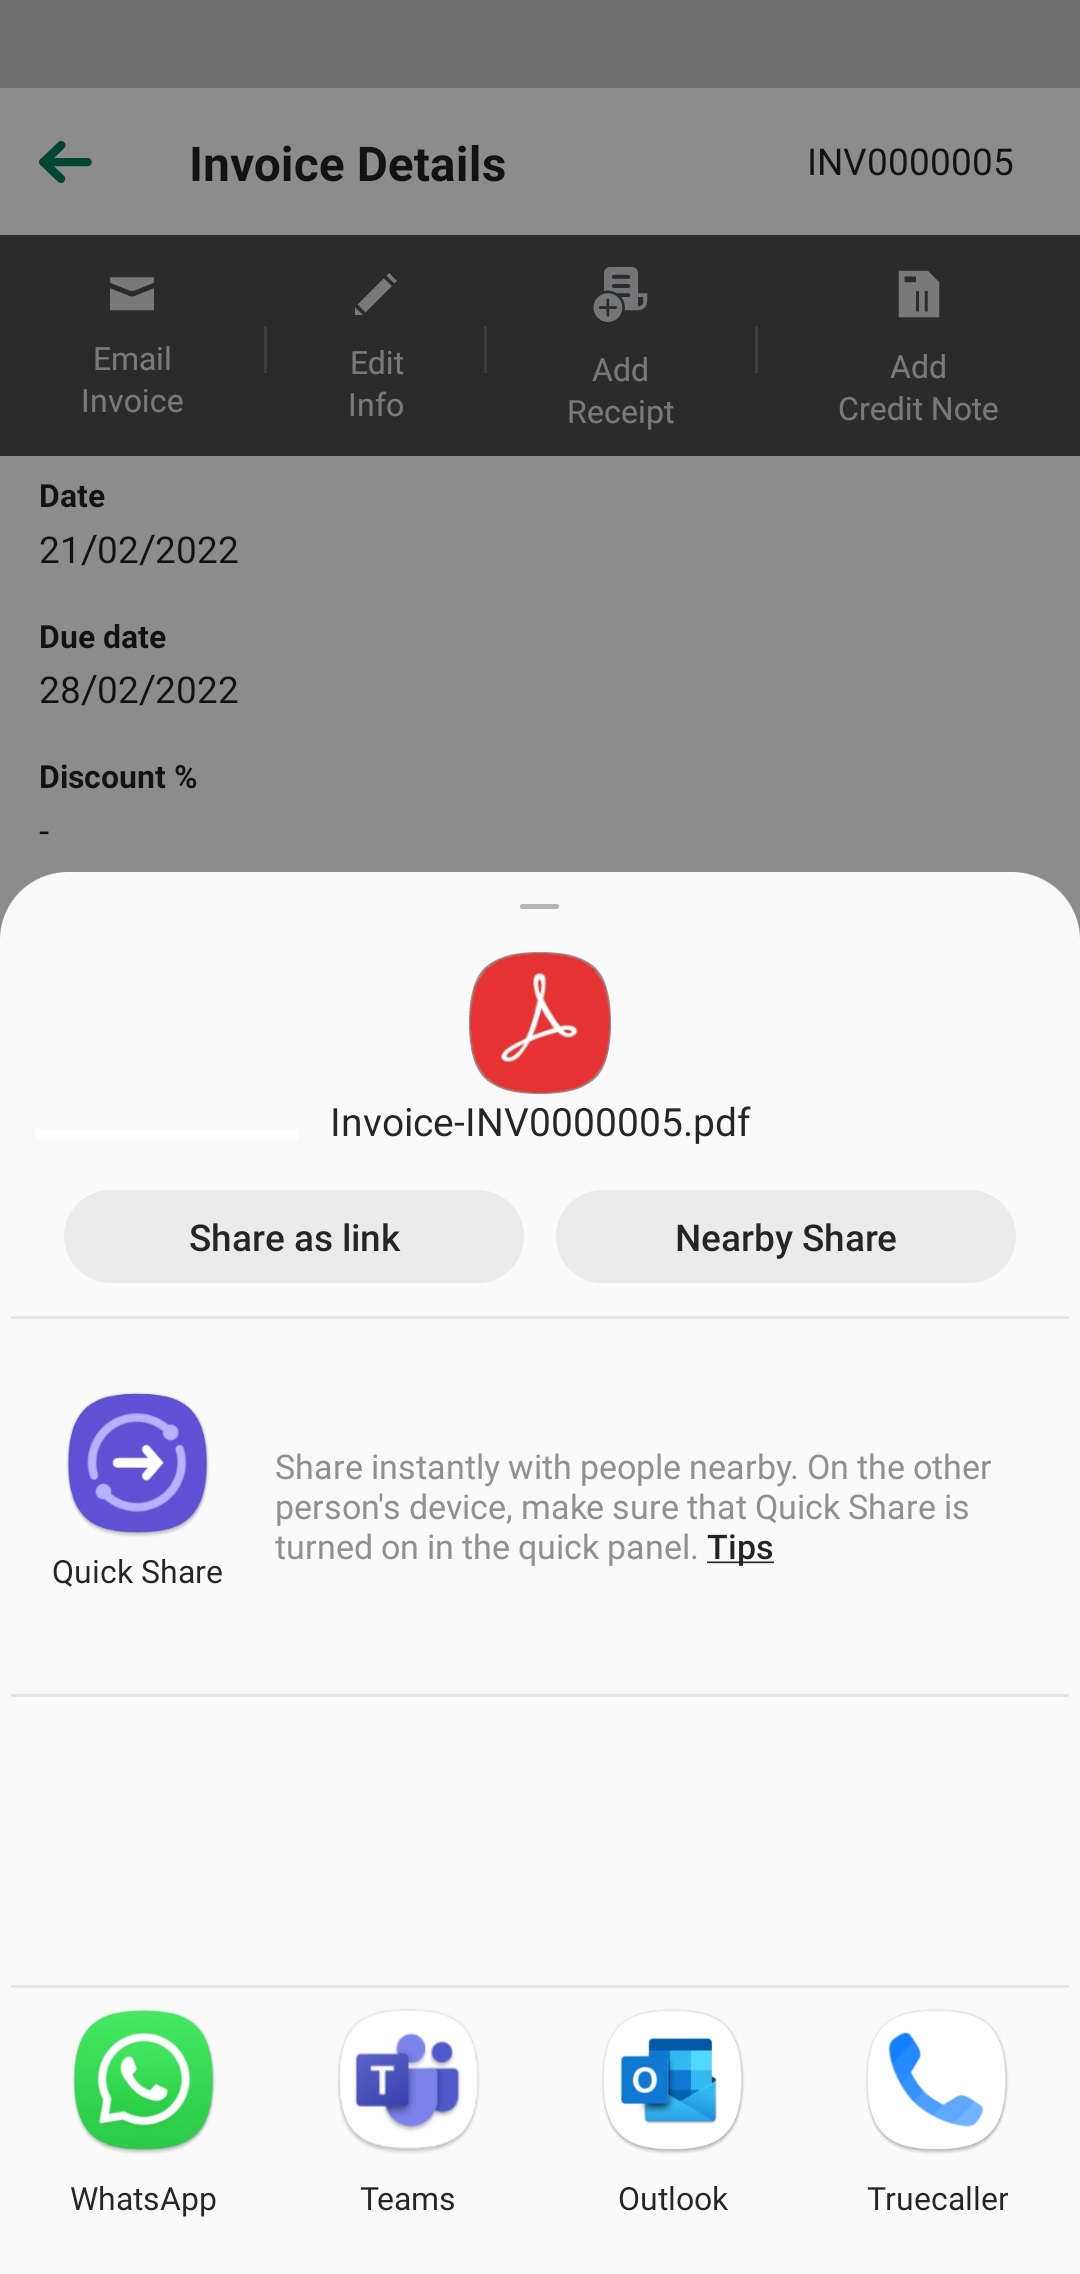
Note: Scroll on the screen to see all supported apps that the document can be shared on.