Inventory, Order Entry, Job Costing, Point of Sales: Printing, inserting, including the agent (user) name that processed a specific Customer/Supplier Invoice and other source documents
Summary
Description
This article discusses how to print, insert/include the agent that processed a specific Customer/Supplier Invoice and other source documents.
Resolution
Consider the following advice to achieve the above outcome:
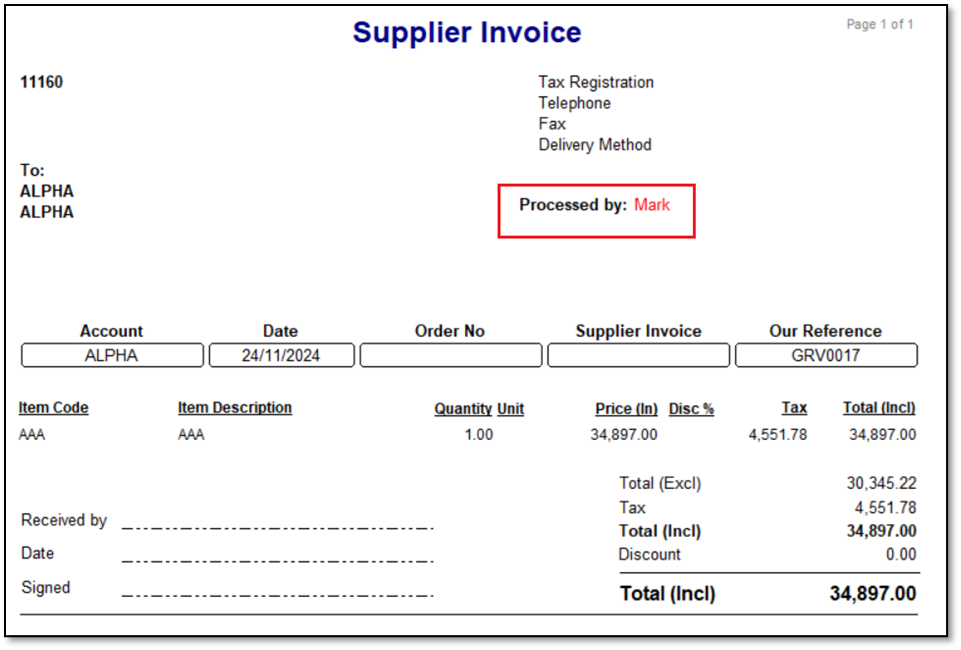
In this scenario, we’ll be referring to print, insert/include the agent who processed a specific Supplier Invoice.
Note the following:
- The same principles discussed below also refer to identifying the agent who processed a customer invoice and other source documents.
- This advice below assumes you have a basic understanding of navigating and working with the Report Writer module: Providing standard source document layouts and is used to customise them.
1. Open the relevant Supplier Invoice layout’s Design screen.
This layout may be a new one as copied from a Standard layout, or it may be one of your existing customised layouts.
2. On the top of the screen, click the DBText icon and then place it in the desired location on the layout.

3. Define the new DBText field as seen below.

4. Also add a new Text field and capture an appropriate value to describe the above field. Drag and drop both fields into the correct position.

5. You can also use the various front formatting fields as required.

6. When done, go to File | Save on the top left of the Design screen.
7. On the Layout Options screen, select the layout to be your default layout to be printed.
This setting must be selected per agent per PC.

8. When you print a specific Supplier Invoice, notice the agent that processed it.
Solution Properties
- Solution ID
- 250104090851070
- Last Modified Date
- Sat Jan 04 09:12:42 UTC 2025
- Views
- 0